Quick Note:
Before we get into the types of lighting, we need to talk about the actual bulbs and output. Generally, you want to use bulbs and flashes/strobes with true white light. Usually this is labeled as “photography toned bulb”. True white light will not cause any sort of color cast. You won’t get the blue or green of a fluorescent or the orange of a warm light. When working in a studio, the point is to be able to control all of the variables. You don’t want to photograph a model with an odd skin tone due to bad light!
Studio Lights: Fluorescent Lighting
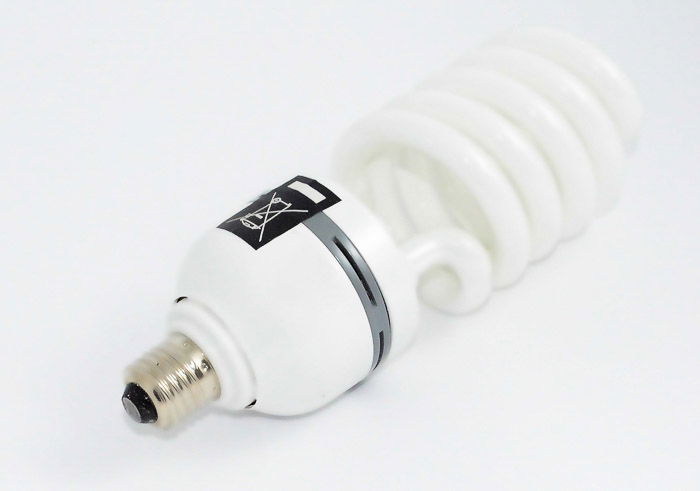
If you’ve ever found yourself in an office, a clinic, or most indoor commercial spaces, you’ve been under fluorescent lights. As a general statement, fluorescent light is a low-pressure mercury-vapor gas-discharge lamp. It uses fluorescence to produce visible light. Fluorescent lights are energy efficient but give off a relatively low output of light. It’s usually around 60-100 watts. The bulbs are readily available, cheap and easy to replace. But they can be tinted in ways you may not favor. Fluorescent lights have a very negative reputation in the photography world due to the blue or green color cast that they produce. Some photographers create their own studio lights using non-flicker fluorescent. This can be a quick, cost-effective solution to a dark space on the fly! There is a new kind of fluorescent bulb called CFL, or compact fluorescent light. These are the curled bulbs you can often see photographers using. All of my soft boxes feature white CFL bulbs tinted specifically for photography. With the addition of CFLs comes the minor complexity in finding the right bulb. Not all are created equal. CRI is the rating established for lights, also known as the color rendering index. This index tells you how clean your light is. The range goes from 0 to 100. For photographers, you want a bulb that has a CRI of 90 or above (do not go under 90!).
Pros:
Energy efficient. Overall, a fluorescent lamp normally offers about 25-35% savings in the amount of energy they use. This is compared to a conventional light bulb, according to the US Department of Energy. Cost effective. Run cold. These lights can be touched when used. Easiest to find pure white tint if using CFLs.
Cons:
Blue, green, or other unflattering light cast when not using CFLs or purchasing a cheap bulb that doesn’t adhere to the CRI. You will need to adjust your white balance to compensate for this discrepancy. Mercury. Fluorescents do contain mercury, so take care if one breaks or leaks! Mercury is a very poisonous substance and should not be treated lightly. When a fluorescent lamp breaks or goes out, there are strict guidelines on how they should be cleaned up and disposed of. These have been set by the EPA. Not very powerful, they tend to be a bit dim.
Strobes, Flashes, and Speedlites
When thinking of photography lights, strobes, flashes, and speedlites come first to mind for most! These extremely popular lighting units are used for a variety of photographic escapades. Most consumer grade camera models come with flashes built-in. Strobes, flashes, and speedlites burst out a huge amount of light in a fraction of a second. They don’t have continuous light like a fluorescent, LED, or tungsten. There are many manufacturers of strobe lighting systems. And there are many light modifying accessories to go with them such as umbrellas and soft boxes. As the light only exists for a fraction of a second, you cannot see exactly how your scene will be captured until you trigger the flash. Once you do, the scene would hopefully be lit as expected with how you position the lights. Strobes tend to be significantly more powerful than continuous lights, and have a specific style to them that attract many photographers. The power allows you to shoot using lower ISO numbers than continuous lights. This bright power can also be intense for your subject. Flashes are also portable. Event photographers often use them for capturing nightclubs and other such dark spaces.
Pros:
Powerful. Flashes are more powerful than any continuous light. You can use lower ISO numbers and higher shutter speeds. Rechargeable. Flashes can be rechargeable and their bulbs tend to last an impressive amount of time. Portable. Flashes can be small and easily carried anywhere! Specific and unique style. The final result is unique and specific, a style that some really like. Perfect white light. Your white balance will have no issues with strobes.
Cons:
Unable to see setup until fired. You will not be able to see how the scene is illuminated until firing the flash. Synchronisation discrepancies. From personal experiences, sometimes flashes don’t fire off in sync with your camera, remote, or other device. Can be irritating to clients. The light is very shocking and bright, and this can be an issue for sensitive clients. Pets are especially problematic to use strobes with. Expensive. Strobes can be pricey, especially good ones!
LED Lights
Pros:
Not as bright. These lights are useless in outdoor situations during the daytime. Don’t expect to use them as a fill! Battery drains fast. With LED lights, battery life drains much faster than with other kinds of lighting. Corded system. Unless you have a V-tap battery or other additional generator, LEDs will keep you glued to an outlet.
Cons:
Brings out eye color tremendously. Because of the continuous lighting, your subject’s pupils won’t be dilated. Ability to use either tungsten or daylight color temperature. Very versatile. LEDs tend to be incredibly versatile and adaptable lights if you know how to use them well!
Tungsten Lights
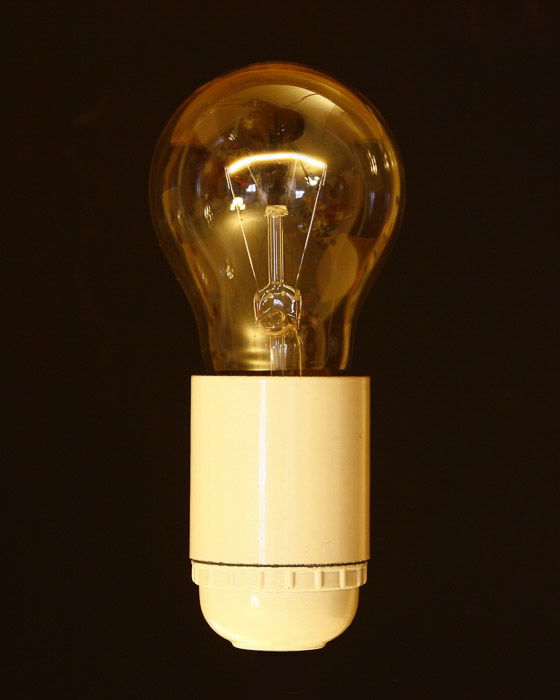
Tungsten lights are the most common kind of incandescent light bulbs used to provide artificial light to indoor areas. How these lights work is that a tungsten filament is housed within an inert gas. When a current is passed through the filament, the naturally high resistance of tungsten causes the filament to glow and output an orange light. Tungsten lights offer the highest output levels but also generate a lot of heat. The bulbs are fairly inexpensive to replace but can change color temperature if brightness levels are adjusted.
Pros:
Much brighter than LEDs and lower wattage. Easy to find. Quite inexpensive.
Cons:
Run hot. Use a large amount of energy. Finicky color temperature. These lights can be very finicky in temperature, especially when adjusting the dimness. Do not last long. Unfortunately, incandescence does not have a long lifespan. Delicate. These lights are easy to break or shake in to not working, so be careful.
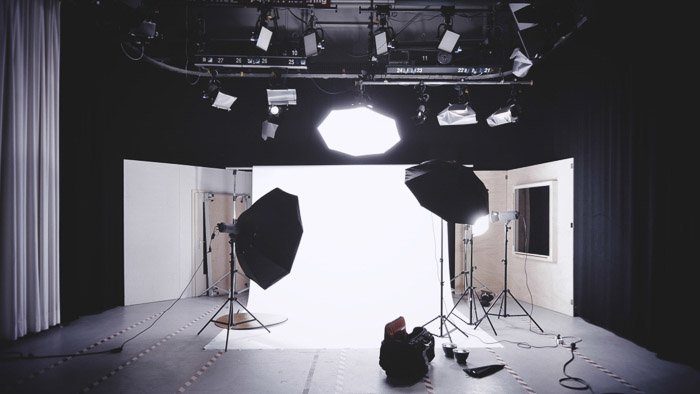
Diffusion
You’re always going to want to diffuse your studio lighting. This ensures that the lighting spreads across and around your subject and space evenly. It doesn’t cast hot spots (overexposed spots in an image). Hot spots are unflattering and a pain to retouch. As well as that, diffused lighting works better for white balance than a spot light. Most studio kits come with a diffuser. If it does not, you can get creative and use a white sheet. These can be a bed sheet, a piece of fabric, etc. The white sheet should be somewhat transparent (not too thick), but thick enough that it isn’t completely sheer. Take this sheet and drape it over your light to create a soft box. This softens and spreads the light. Just ensure your lamp doesn’t burn too hot (fire risk!).
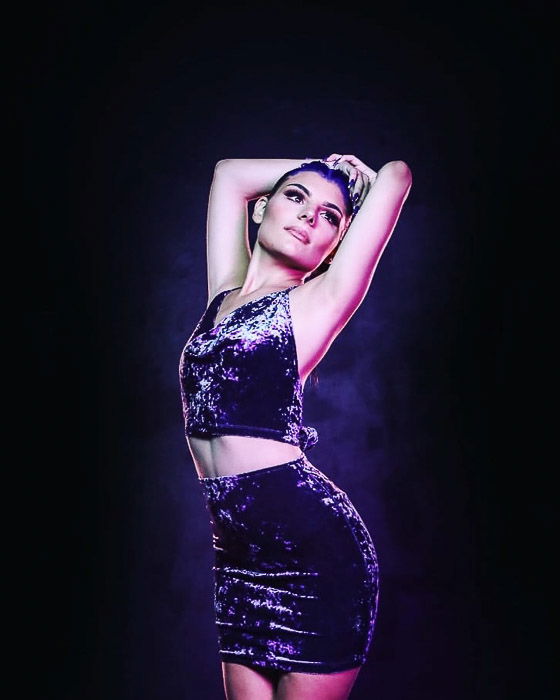
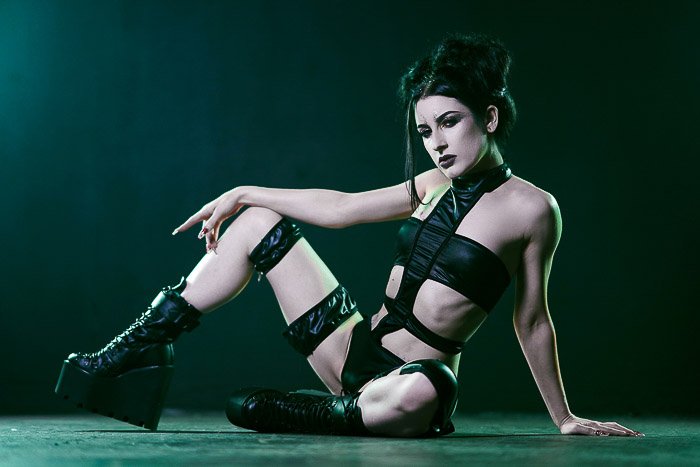
Bonus: Colored Gels
Now that you’ve found yourself outgrowing traditional white light a bit… add some color! Colored gels are filters that go on your light in order to change the output color. You can buy these at photography stores or make your own. Gels tend to range in shape, size, color, intensity, and more. There are a lot on the market! The key point however is to ensure you know their melting point. Because lights can run hot, you don’t want the gels to melt as many are made of plastic! Cellphane is a good DIY way of making gels. Just wrap some colored sheets around your soft box or LED light. The key it to make sure you’re wrapping on lights that run colder, or they will melt. Then just attach with tape! The possibilities with gels are limitless, there is so much you can do! In regard to color combinations, if you make your gels have the same intensity, they will match with one another. This also makes editing a lot easier later on. Now that you know what each of the artificial studio lights are, you can take advantage of them and explore the realm of studio photography! For more tips, check out our new post about light leaks next!