Luminar 4 is no longer available on its own, but Skylum Luminar NEO gives you access to it. The question is, does Luminar 4 still deserve your time and money? Read this review to find out what this software does well.
Luminar 4 Photo Editing Software Review
Skylum released this software in 2019 to replace Luminar 3. It is a significant upgrade from the previous program. The program has gone through a few updates since, with some new features added in version 4.3. The interface is different, more streamlined, and easier to use. This software is a stand-alone photo editor and works as a plug-in with Lightroom and Photoshop. It’s easy to send images back and forth between the programs if you have Adobe workflow and like some of Luminar 4’s features. Alongside Luminar 4, Skylum produces Luminar AI. As mentioned, it also released Luminar Neo early in 2022. The programs overlap but are independent to a certain extent. They all include some level of AI and basic photo editing tools.
Audience and Usability
This software is suitable for beginners. It is intuitive and easy to use. And there are advanced photo editing tools. But these tools are hidden until you are ready to use them. Luminar 4 is a Lightroom equivalent. But it has the layering capabilities of Photoshop. It is better than Photoshop in some ways because it is more intuitive to use. Some effects in Luminar 4 are more what you would find in Photoshop Elements—a program designed for casual photographers. Other effects, like sun rays, are more challenging to achieve in Photoshop.
Getting Started with Luminar 4
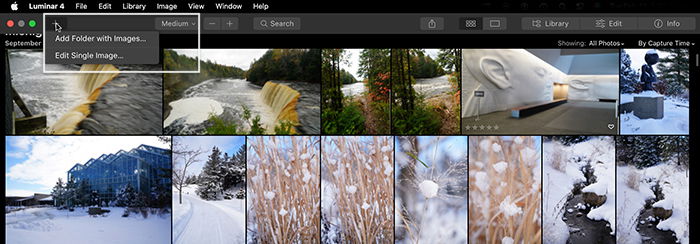
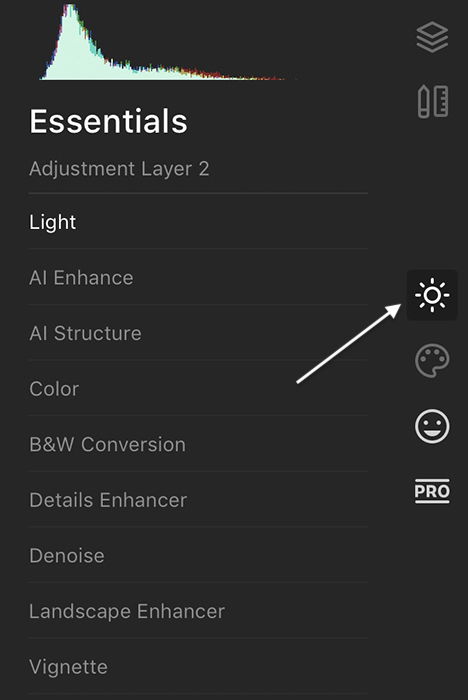
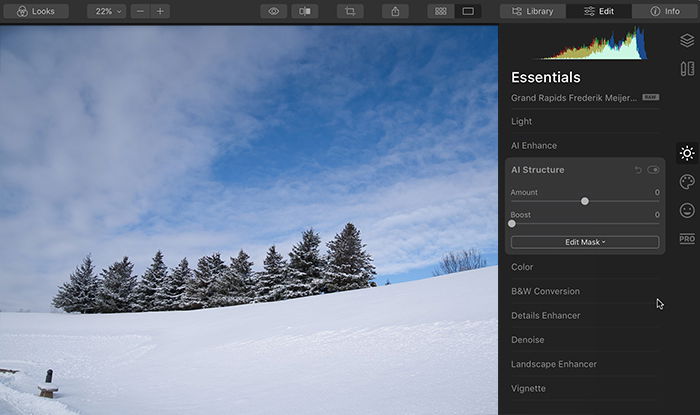
The program has no problem reading RAW files. Point the program to the folder or file you want to edit and get started. There is no import process. It is excellent for those who find waiting for Lightroom imports tedious. But if you like to rename files, add keywords, or apply a preset at import, you are out of luck. Skylum significantly redesigned the Luminar 4 workspace, making the workspace is easy to navigate. In the upper right-hand corner, you have the option to open the Library, Edit, or see metadata under the Info tab. There are links to crop, export, and a quick link to looks or filters. Click the Edit tab to access the editing tools. The tools are organized into four categories—Essentials, Creative, Portrait, and Professional. At the top, you also have Canvas and Layers. At the bottom, you have easy access to your photo editing history. The Essentials are divided into the following:
Light AI Enhance AI Structure Color B&W Conversion Details Enhancer Denoise Landscape Enhancer Vignette
Click on a heading to open panels with familiar sliders. Like Lightroom, sliders increase or reduce the effect. The panels are organized differently from Lightroom, but they mostly make sense. On each panel is an Advanced Settings button. Click this to reveal more tools.
Key Features of Luminar 4
Let’s start this Luminar 4 review with key features that set this program apart from other photo editing programs.
Luminar Looks
The program comes packaged with “Luminar Looks” or presets. These change the look of your image to anything from dramatic to street grungy. There are dozens of looks included with your download. But if you do not find a look that fits your photo, Skylum has you covered. They are always adding more free and paid content to the website. Some of the looks include AI features. They use artificial intelligence to analyze your image and suggest photo edits. With one click, give your image a look. A slider built into the preview lets you adjust the filter’s intensity. You can add a little or a lot. The looks are easy to use and produce good results. For photographers who do not like to edit images, looks are just what they need.
Before-and-After Split View
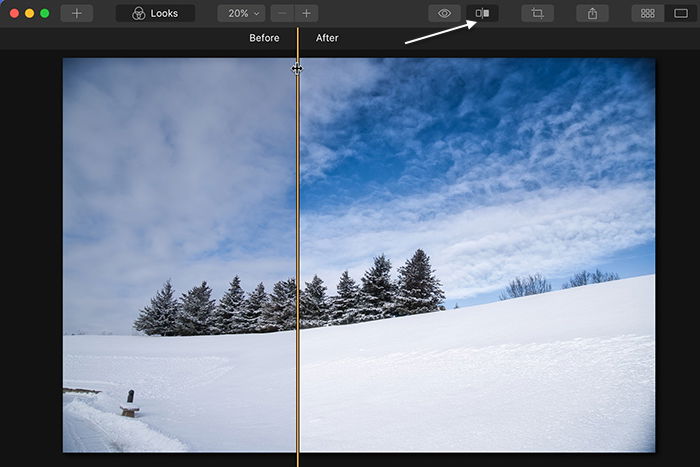
Most programs have a way of showing you a before and after version of your photo edits. In Lightroom, you can use the Develop module’s forward slash key (/). But there is nothing better than Luminar’s before-and-after split-screen option. Click the button above the workspace and drag the slider left and right across your image. You place the slider where you want to evaluate the changes best. It seems like a minor detail. But it is something I miss when working in Lightroom.
AI Augmented Sky and AI Sky searchment Tool
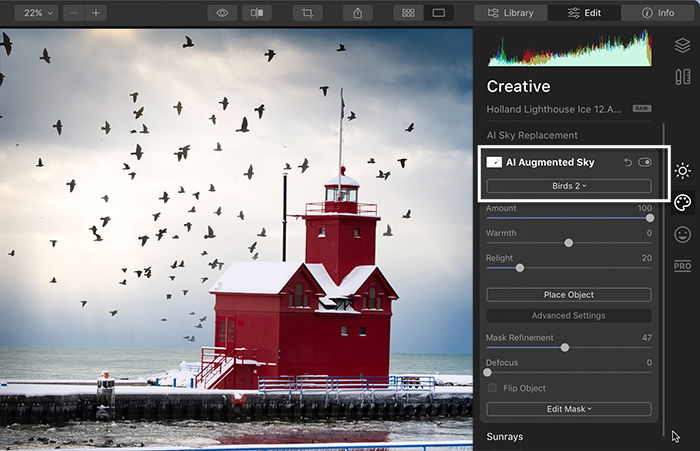
There are a lot of creative AI tools in Luminar 4, including AI Sky searchment and AI Augmented Sky. The latter is new to version 4.3. The AI Sky searchment tool works fast and is a solid sky replacement tool. It masks around trees and branches. The tool does not do quite as well as Photoshop with blending the scene. But it will work well for most images. Luminar 4 lacks a couple of features included in Luminar AI. For instance, you cannot replace the sky in reflections. The program does come with many pre-loaded skies, and you can add your own. But the program lacks previews. You have to try each replacement one by one. The AI Augmented Sky tool adds objects like clouds, birds, fireworks, or planets to your photos. The program automatically masks foreground elements. Plus, you can refine the mask if the program does not get it right. And you can defocus the objects to blend with the background.
More Creative AI Tools
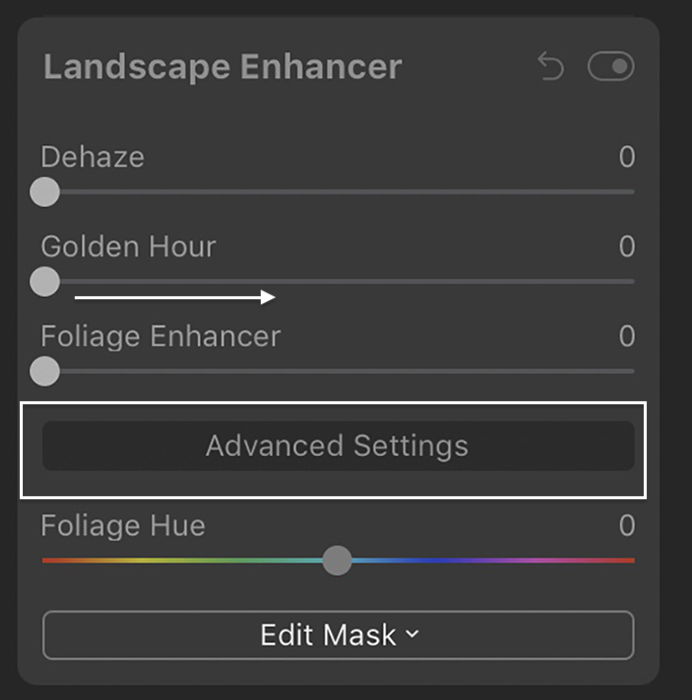
Skylum is all about adding creative and AI tools to their software. Many of these tools are under Creative edits. On top of the photo editing tools like those in Adobe Lightroom, Luminar 4 includes AI Enhance, AI Structure, and Landscape Enhancer. AI Structure is like the clarity slider in Lightroom. It enhances detail. But it targets only the essential subjects. The Landscape Enhancer option includes the Dehaze slider used in other programs. But it also includes Golden Hour and Foliage Enhancer sliders. Click Advanced Settings, and you can change the colors of the foliage. Also, you can choose to add textures, glow, fog, or a whole host of Color Styles (LUT)—”Look Up Tables.” Hover over the title to see a preview of your image. Luminar 4 also lets you add sun rays to your image. Place the sun naturally into your scene. Then use the sliders to blend the sun and create a natural look. The ease of adding light goes beyond what you can do in either Photoshop or Lightroom. If you like the AI adjustments but only want to apply them to certain parts of your image, no problem! The Edit Mask tools are right there in the panel.
Handy Edit Masks
In most editing panels, including tools that use AI, there is an Edit Mask button. Click this to apply changes to select parts of your image using a brush, radial filter, or graduated filter. Hold the Alt or Option key to subtract the edit from your photo. It may seem repetitive to have a Mask Edit button in nearly every panel. But there is a logic to the design. The masks are handy. You can add when and where you need them. The tools work smoothly, and you can see your adjustments immediately in the preview.
AI Portrait Tools
There is a dedicated section in Luminar 4 for editing portraits. Tools include AI Skin Enhancer, AI Portrait Enhancer, and the Orton Effect, which blurs the background. AI Skin Enhancer smooths skin, removes shine, and removes blemishes. The results are very subtle. You may not see much of a difference in some portraits. AI Portrait Enhancer is like the Liquify tool in Photoshop. Photoshop has more options, but Skylum has made smart decisions on what to include. This program was created by photographers who know the types of photo edits photographers make. You can brighten eyes, darken lips, and slim the face. You can also quickly remove dark circles under the eyes.
Professional and Advanced Tools
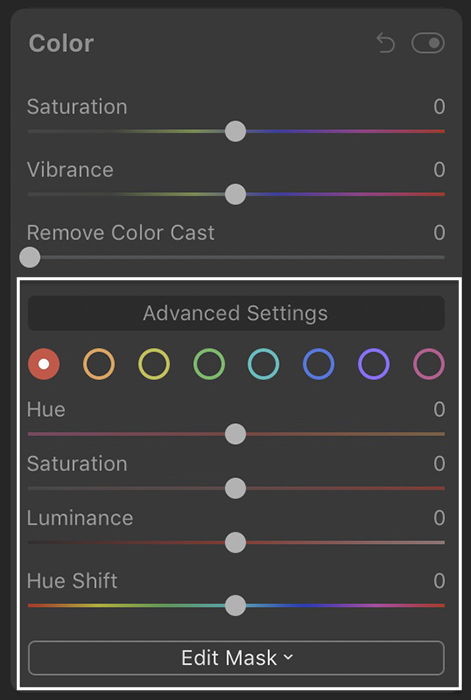
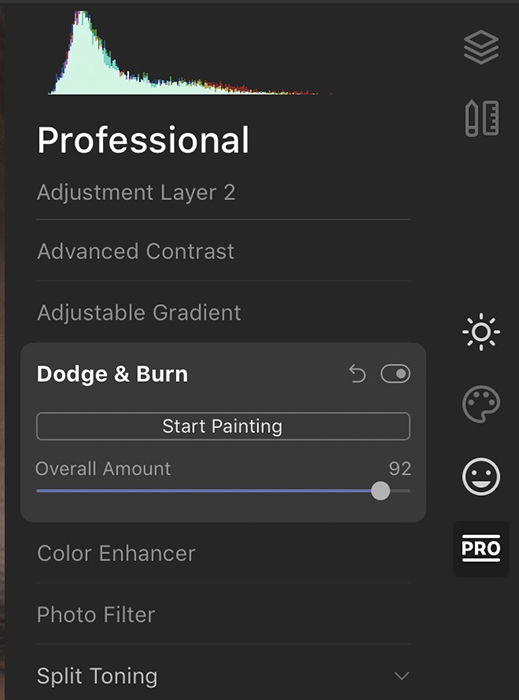
Luminar 4 is set up for the beginner photographer. But do not let that fool you. You decide if you need more. There are advanced tools in most panels. And there is a separate professional section. The advanced tools give you more options. For instance, the basic Color tool panel includes Saturation, Vibrance, and Remove Color Cast. For most photographers, these options are enough. But click the Advanced Settings button, and you have control over Hue, Saturation, and Luminance for individual colors. The Professional section includes the following:
Advanced Contrast Advanced Gradient Dodge & Burn Color Enhancer Photo Filter Split Toning
The Advanced Contrast lets you change the contrast independently in highlights and shadows. Click on Dodge & Burn and start painting. You can lighten, darken, or erase.
Adjustment Layers
Photoshop and the newest version of Lightroom use layers for individual or targeted adjustments. Luminar 4 is structured a little differently. You can add as many adjustments as you want on a layer. You can even change the blend mode and the intensity of your changes. Add another layer with different changes or blend modes. These edits apply globally to the entire image. But the handy Mask Edits buttons are right there if you want to change only parts of your image. With the handy masking tools, you can keep the best elements from each adjustment layer. Each layer is independent. So you can stack as many layers as you want or toggle the layers on and off to compare edits. Luminar 4 does not make virtual copies, but adjustment layers work just as well.
Problems with Luminar 4
Luminar 4 has a lot going for it. But there are a few issues that limit usability.
Limited Library and Metadata
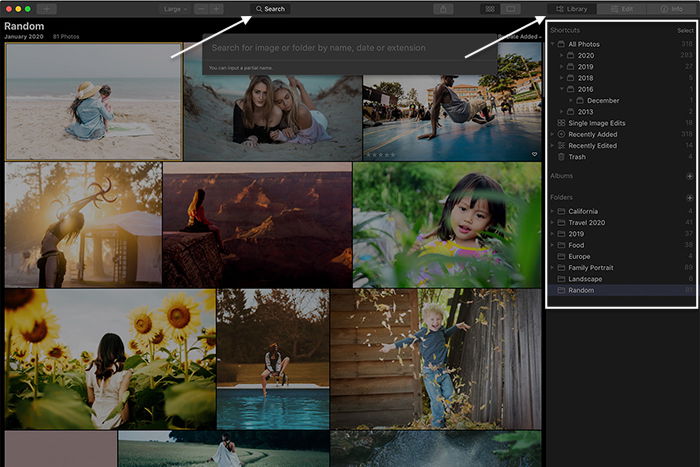
It has an improved Library module. But the features are limited compared to other programs. You can pick, star, and color-code images. All these options are hidden in keyboard shortcuts and right-click menus. The Info panel includes basic EXIF data from your camera. But it does not include other metadata like tags, titles, or descriptions. The library is basic. You can create albums, and there are some intuitive smart folders like “Favorites.” But if you have a lot of images, you may struggle to find the one you want. You can now search images by name, date, or extension. But you cannot search with keywords or EXIF data like focal length.
Basic Clone and Erase Tools
The Clone and Erase tools are in the Canvas module. They get the job done, but they are a little clunky. The Erase tool works fine for simple removals. Save the Clone tool for dust spots and easy removals. Both the Clone and Erase tools automatically create new adjustment layers on the plus side. You can easily toggle the layer off or delete it. You can adjust the intensity and add a mask to the layer as with all the other tools.
Difficult Batch Processing Workflow
In Luminar 4, you can copy settings from one image to another. There is also an option for batch processing. But you have to reload the photos you want to process in the program. You cannot select a set of images you have already loaded from a folder and batch edit. This means you have to have a dedicated workflow for batch processing.
Lacks HDR and Panorama Stitching
Luminar 4 has most of the tools that photographers need. But there are two glaring omissions. The program does not stitch images into a panorama or create a bracketed HDR image. It works with Aurora HDR, another Skylum program, but this is a separate purchase.
Program Lag
Some tools like the AI Sky searchment work surprisingly fast. Others take some time to load. This lag was especially apparent when using the Clone and Erase tools. Presumably, the program needs time to process the image before it is ready.
Is Luminar 4 Worth the Price?
When you buy Luminar 4, you get the program and a perpetual license. This means there are no ongoing subscription fees. You own the program outright. The downside is that you will not get updates, and Skylum is rolling out new versions of its AI tools at a fast pace. As Skylum launched Luminar NEO in early 2022 as a replacement for Luminar 4, the company does not appear to give price breaks to current Luminar customers. But the program costs less than the price of a year’s subscription to the Adobe Photography plan. So it is worth the money to use for a few years. You can decide later if you want the upgraded tools. The cost is worth it even if you only use the program for Creative tools like AI Sky Augmentation or Sunrays. This program is perfect for photographers who do not need continuous updates. You can buy Luminar NEO and get Luminar 4 for free—and enjoy a 30-day money-back guarantee. Unfortunately, there’s no free trial for Luminar 4. Pros:
Clean, intuitive interface Many filters (“Luminar Looks”) for quick editing Easy-to-use AI tools including AI Sky searchment Many advanced effects like sun rays and sky augmentation Works as a plug-in with Adobe software Advanced adjustment layers for editing flexibility Masking tools at your fingertips
Cons:
Lacks metadata options like keyword Some tools take time to load Basic library functions A limited lifespan
Verdict
For casual and semi-professional photographers, Luminar 4 is all you need. It has a clean interface and all the tools to edit your photos. This version has plenty of AI tools, including an AI Sky searchment tool and room for post-processing creativity. This program is not for the photographer who likes to have the newest post-processing tools. Skylum rolled out new programs and features like Luminar NEO in early 2022. So you may want to see what Luminar AI and Luminar Neo have to offer.
